Is it time to spruce up your surroundings? Elevate your interiors? Go beyond paint – discover EasyCraft Panelling and all that it can do for you. Is it expensive? Is it hard to install? We’re going to answer questions and give you the information and resources to succeed.
Our Guide for How to Panel a Wall
BetaBoard features EasyCraft Panelling – a full range of high-profile plasterboard and wall panelling products to enhance your projects and bring your ideas to life. BetaBoard is your resource for plasterboard and all the renovation supplies you need. With 5 great stores in Brisbane, Logan, Ipswich, and North Lakes, we’re convenient and ready to assist. Come in and speak with our expert staff, or get in touch online.
Getting Started
You may already have decided on the look you want, or you may still be deciding. Traditional or modern, high design or simplified, rustic or contemporary – you can set the ambience of almost any interior with the right wall panelling. Your supplier can help you decide – with product samples, colour charts, and photos of great installations.
How Hard is it?
If you have household DIY skills, you can put up wall panelling. Like painting, it’s mostly about planning and preparation, with a little more of both. It is usually not a small project, but installation is straightforward, and we are here to answer your questions. We can definitely show you how to panel a wall.
Measure, and then Measure Again
Measuring your space is one of the most important steps. The width of your wall is the key to everything else. This will help determine what panel width will be best. You may want to obtain panel samples from your supplier to match up in your space, to get an idea of the look and sizing you’ll be using. Make a sketch of how you want to put up the panels – this will help work out the sizes and measurements you’ll need, and you will refer to it when you’re doing the actual installation. Write everything down.
Gather Your Tools
Here are some basic tools and supplies you’ll need:
- Tape measure – a good long one.
- Carpenter’s level – longer is bulky, but shorter may not be enough.
- You may want a carpenter’s square as well – especially for setting detailed finish pieces.
- Pencils – you’ll need extras.
- Glue
- Caulking and caulking gun
- Putty knife
- Paint brush – use the type and sizes recommended for the finish paint you’ll use.
- Paint roller – like the paint brush, this will usually be a simple utility grade.
- Cutting-in brush – angled front edge for detail painting.
- Drop cloth – you’ll need this for painting. Plastic ones are not expensive – get several.
- Paint and primer that are compatible with the plasterboard you’re using
- Varnish – check with your plasterboard supplier.
- Hand cleaner, paper towels, clean-up supplies
Your supplier will be able to recommend and supply glue and caulking that will work well with your underlying wall and the panels you are installing. They can also guide you on primer and finish paint selection. In some cases, they may recommend a final varnish coat. It’s a good idea to have spare paint brushes and roller inserts on hand so you don’t have to stop working if you need to replace one.
Prepare the Wall
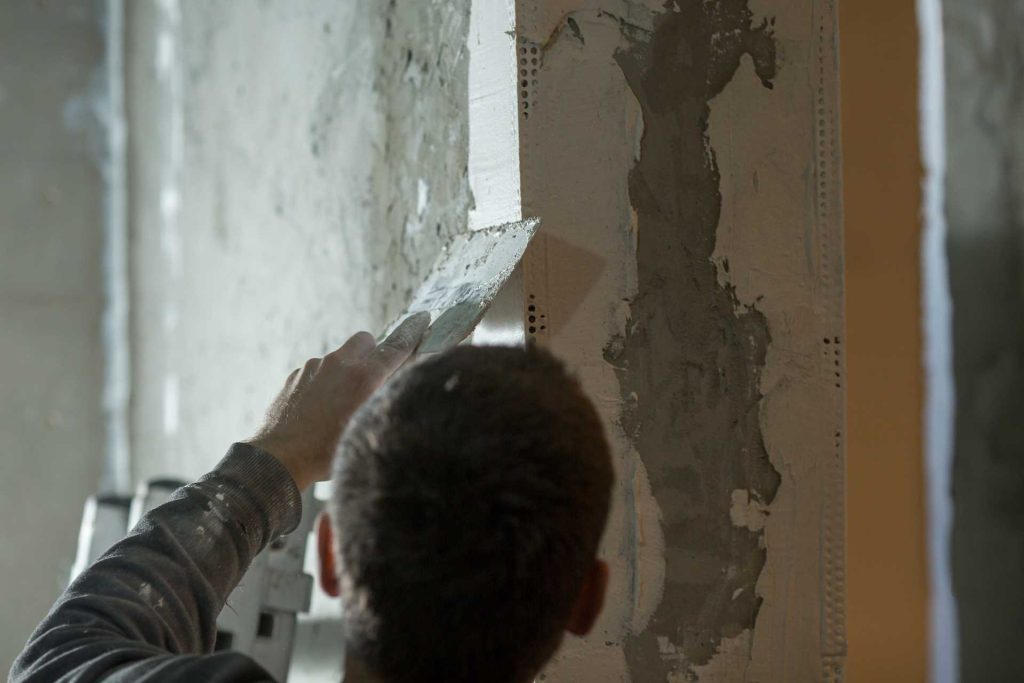
Wall panelling will cover all sorts of imperfections on your walls, so it’s a good idea to inspect your existing walls for any trouble spots that may need repair before the panels goes up. Repairs don’t have to be fancy – smooth down any bumpy plaster with a rough sanding block, and strip off any peeling paint. Fill holes and cracks with caulking and wipe smooth using a putty knife. The new wall panelling will be fine if the underlying wall is flat, stable and dry.
Install Your Panels
The design and detailing you’ve chosen will guide the process, and each installation is probably going to be a bit (or a lot) different. This is where your sketches and measurements will help you to know how you’re going to proceed. You may want to mark your pre-cut panel sections with a lightly pencilled ID on the back so you can’t mix anything up. In general, start at the bottom and work your way up and across. Use plenty of glue, setting the major panels first and then going on to detail pieces. If your design incorporates wainscoting, you will usually want to set that first and then any panels above it. Wainscoting detail pieces may be left for a last step so they won’t get damaged in working on panels overhead. Let each panel dry enough to be securely in place before going on to the next. Use the carpenter’s level to keep things straight. The carpenter’s square used with the level will let you set vertical details accurately. You can draw pencil lines on your underlying wall as a guide. If you wind up with some small gaps between panels – possibly due to a wavy underlying wall surface, you can fill with caulking using the caulking gun. Let everything dry.
Priming
You will have consulted with your supplier for the best primer for your plasterboard. Apply with the paint roller, using a small paintbrush to get primer into the areas the roller can’t reach. Let the primer dry thoroughly.
Painting
Start by painting edges and details. You may want to use a cutting-in brush, which is a special small paintbrush with flat bristles and an angled front edge. This helps you get the paintbrush into corners and the smallest areas. When your panelling is all edged in, you may want to use a wider brush to fill out from the details, until your area to be painted is broad enough to allow you to apply paint easily with a roller. Allow to dry for several hours before applying a second coat.
Varnish
Your supplier may recommend using a final water-based varnish coat to protect the painted surface. This is applied in the same way as the paint coat. Use new brushes and rollers, and allow to dry very thoroughly.
Admire Your Work
Time to pat yourself, and maybe a helper or two, on the back. You’ve mastered how to panel a wall, and you’ve made the big difference in your surroundings you imagined. You’ll be enjoying it for years.
Talk With the Experts
Nothing is more important to success than having all the information you need before you embark on a project, and having support during your work. BetaBoard stands by our excellent product line, and stands by you while you transform your interior. Our EasyCraft Panelling is so versatile and comes in so many styles and choices, it will have the look you want.
EasyCraft – That’s How to Panel a Wall
The best way to find out about EasyCraft and everything it can do for you is to visit one of our 5 well-stocked stores around Brisbane, Logan, Ipswich, and North Lakes – and talk with our expert staff. Or if you prefer, get in touch online for information and pricing, and to look through our offerings. We’re one of Australia’s leading plasterboard and panelling suppliers – and we are looking forward to your new EasyCraft project!